How to use the Add Fastener window
To add a new fastener to your assembly, follow these steps:
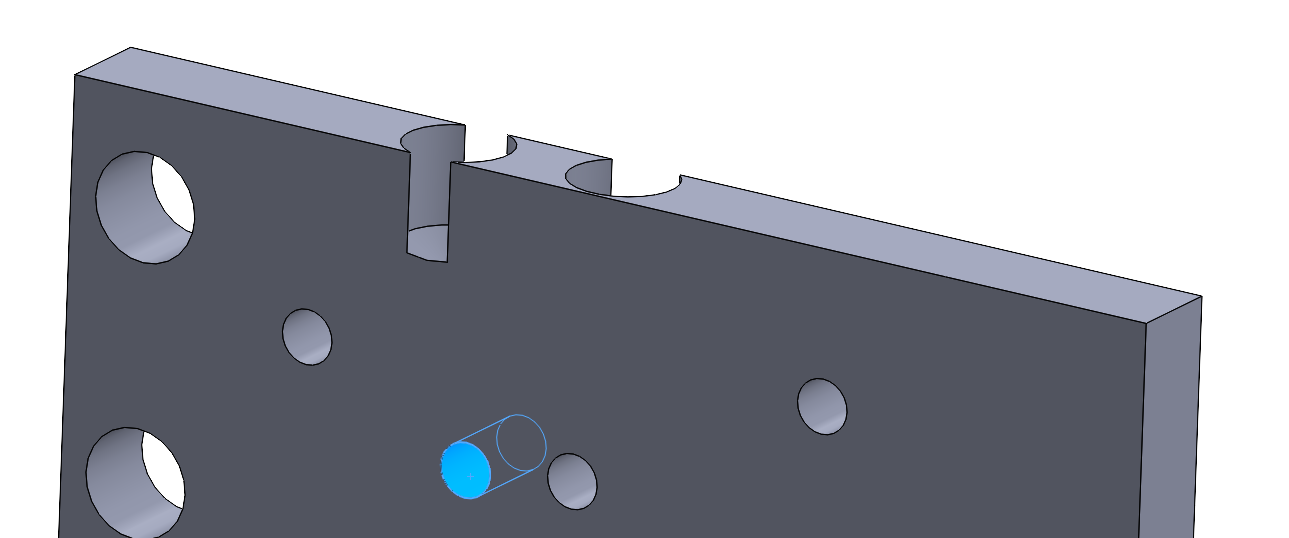
1. (Optional) select a hole face
If you select a hole before opening the Add Fastener window, Lightning will preselect the right fastener diameter.
If the hole is part of a pattern, we also select the first hole in that pattern. If you drag the bolt to that hole and create a pattern, this is the correct seed position.

2. Click Add Fastener in the toolbar
Click the left-most button in the Lightning toolbar to show the Add Fastener window.

3. Select a type, size and material
When you select a fastener type, we search your database for all available diameters. Then you choose a diameter, length (not for nuts and washers, obviously) and a material.
If there is only one option left, the two buttons on the right become active.
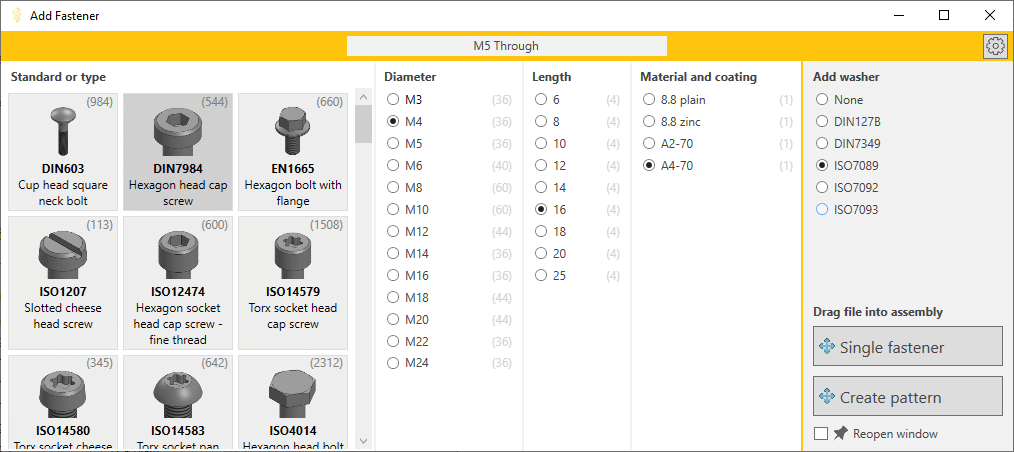
4. Select a washer type
One of Lightning’s coolest features is its ability to add washers under a bolt or nut. If you have washers in your database, you can select a preferred washer type (None is an option) and we will use this preferred type by default when you add a fastener that needs a washer. Lightning selects the right washer diameter and a matching material for you.
Adding washers works best when your bolts have mate references because SOLIDWORKS adds a concentric and a coincident mate when you drag in the bolt. Lightning deletes the coincident mate and adds three new mates to fix the bolt and the washer.
If you added the bolt without adding mates, we use face names to mate the washer. This works best when you use our Fastener Library.
5. Drag the part into your assembly
Once the buttons are enabled, you can add the fastener to your assembly. You have two options:
- Drag a fastener from the Single fastener button:
- Lightning closes this window when you start dragging.
- SOLIDWORKS adds mates for you when your fastener has mate references and you drag the part over a hole.
- Lightning adds a washer with mates when you selected a washer type.
- Drag a fastener from the Create Pattern button:
- Lightning closes this window when you start dragging.
- SOLIDWORKS adds mates for you when your fastener has mate references and you drag the part over a hole.
- Lightning adds a washer with mates when you selected a washer type.
- Lightning creates a component pattern with the bolt and washer.

The video still shows a third ‘Add at origin’ button that we have since removed.
6. Reopen the Add Fastener window
If you check the Reopen window checkbox at the bottom right, the window reopens after adding each fastener. It’s such a simple feature, but it feels like magic.